
Inside: 15 beautiful Christmas art works by kids.
I was wandering through our school today admiring all the beautiful Christmas art. I think we have some very talented teachers and students.
Hope you enjoy these and that you’re inspired to try one or two with your own students!
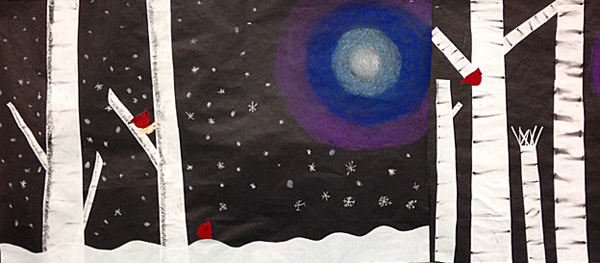
This gorgeous winter scene was created using a variety of techniques. The moon is done with chalk pastels, while the trees, snow, and little red birds were cut out of paper and glued on. The marks on the birch trees were created with plastic cards dipped in black paint and then scraped across the trunk. The finishing touch was the snow.
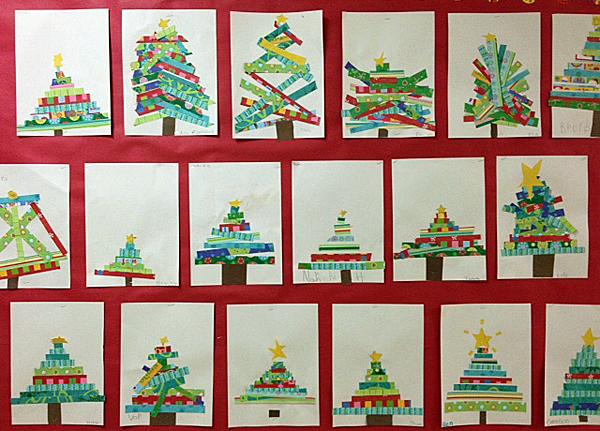
These colourful Christmas trees were made by cutting various lengths of paper strips from Christmas wrapping paper. You could also use scrapbook paper. I love how bright and whimsical they are!
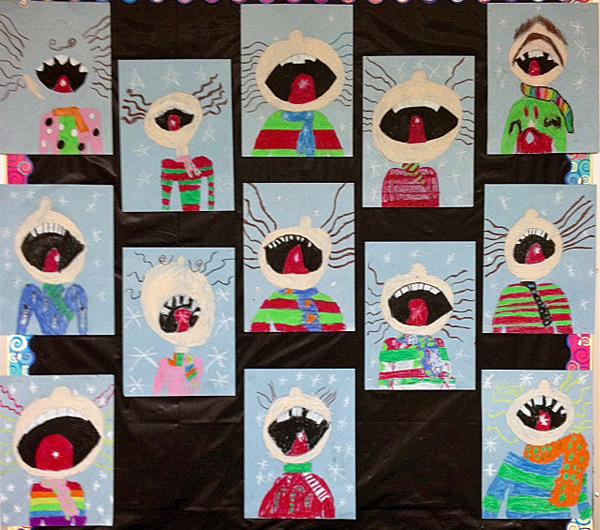
Catching snowflakes on your tongue: I think these are just so sweet. The artists used oil pastels to create these beauties!
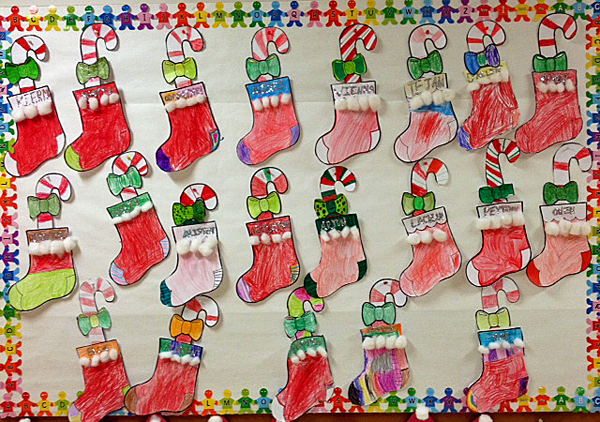
The stockings were made by a Kindergarten class and they used a template and coloured them with crayons. I love the touches of cotton puffs and glitter here and there.
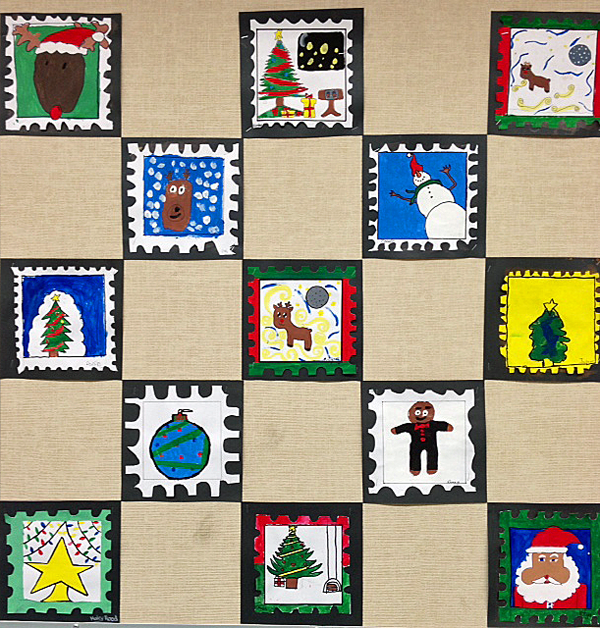
These are Christmas stamps created by a Grade 4 class. They were all done in tempera paint. I love the bright colours and how they added the variegated edges to the stamps.
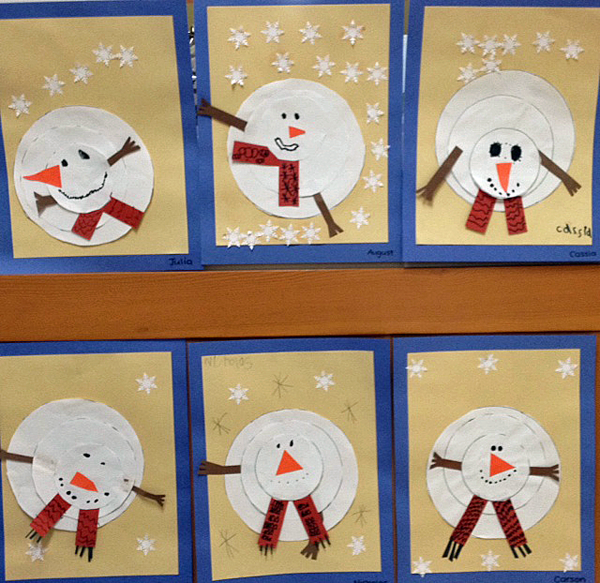
The melting snowmen are hilarious. I just love this perspective, too! These were created by a primary class and you can see they used circle templates for the snowmen. The snowflakes are those puffy stickers you can get from Michaels.
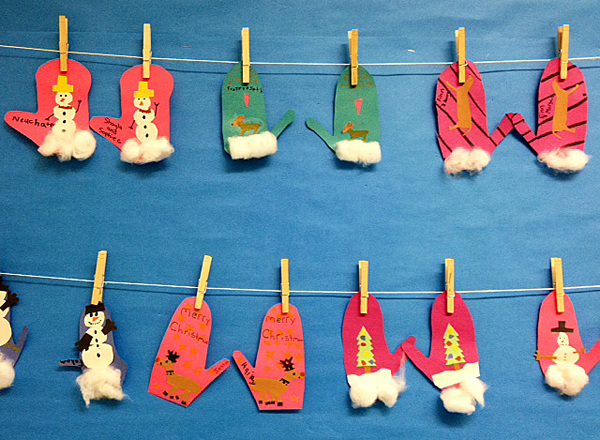
These mittens were done by another Kindergarten class. They used templates for the mitten shapes. I’m not sure how they got the picture on each mitten so identical. Perhaps they had tracers? This would be a great lesson on symmetry, too!
These snowy pictures are very simple but I like how some of the kids used torn paper to represent the snow.
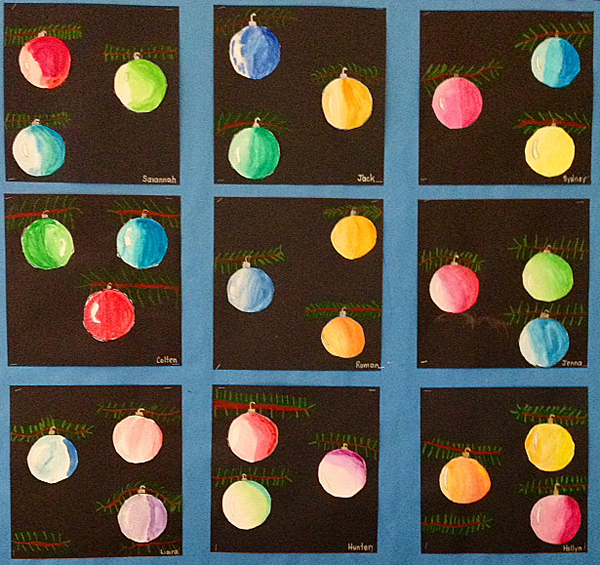
I think these Christmas ornaments are stunning! They look especially wonderful on black paper. The kids traced circle templates and then coloured them in using chalk pastels. I love how they practiced shading and adding bits of highlights!
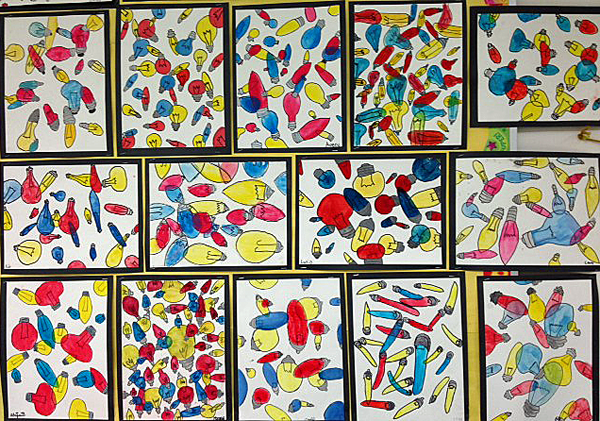
I thought this was a unique way to create a Christmas light picture. The kids used crayons and did an awesome job!
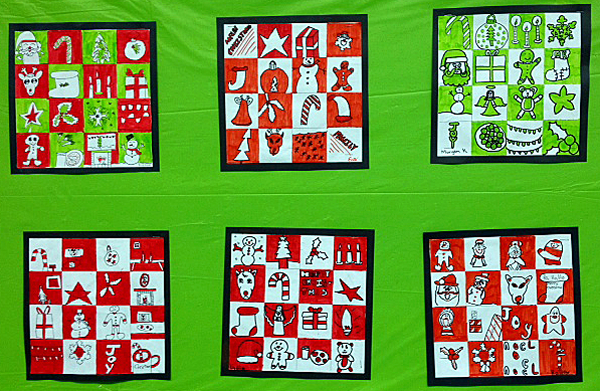
Little Christmas quilts! I think the use of just red, white or green is very effective. All their little drawings were outlined with a black sharpie.
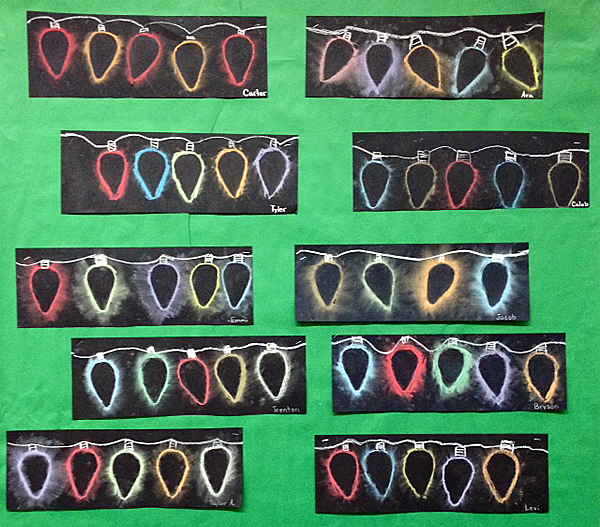
These Christmas lights were made using light bulb tracers and chalk. So very pretty!
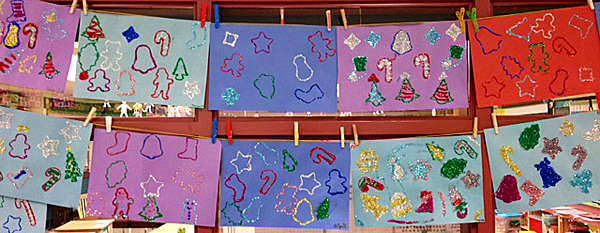
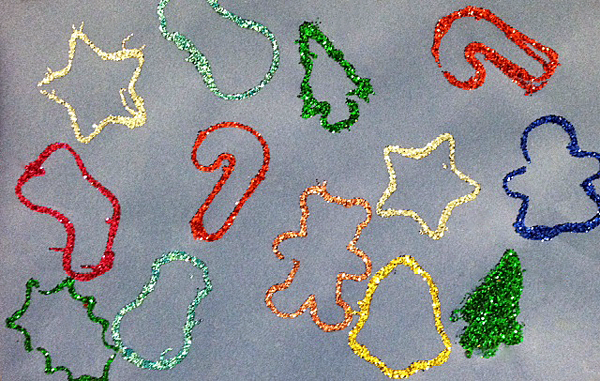
These were done by another primary class. The kids used cookie cutters to trace their various shapes. Then they outlined them in glue and added glitter.
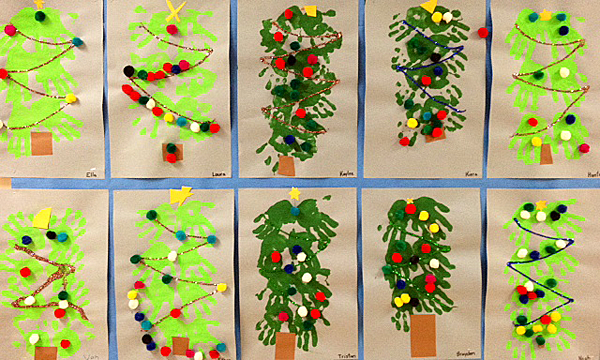
I thought these hand-print Christmas trees were so unique! After making the branches with their hands dipped in paint the kids glued on pom poms for the ornaments and connected them with glitter strings.
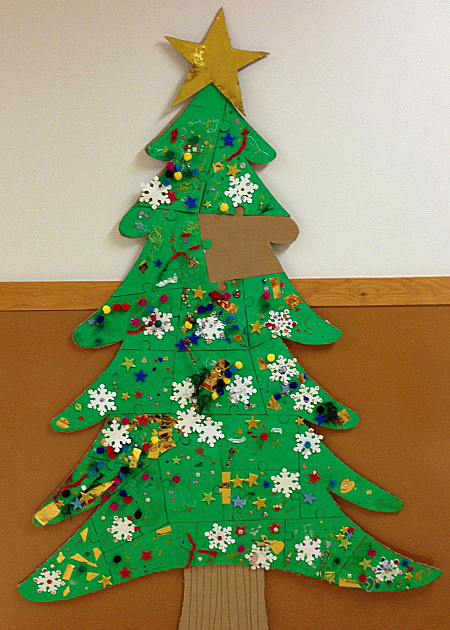
This is a puzzle Christmas tree. Each child was given a piece of the puzzle and asked to decorate it with the various supplies that were provided. They used lots of foamy stickers. Such a clever idea.
I hope you enjoyed the art tour. Merry Christmas!
JOIN THE NEWSLETTER! NEVER MISS FREEBIES & UPDATES
What a wonderful collection of art. Happy Holidays!
Thanks, Sylvia. You too!
Loving those shaded ornaments!
I love all the Christmas lights ones. I am going to pin this so I can use some of these for Winter crafts. The top down snowman looks great!KimberleyFirst in Maine
These are great! I pinned so I could try a few of the ideas. Thanks for the tour! Crystal
Your school must look very festive.Sandi
Beautiful! They are very talented! I love the snowflakes on the tongue-I may have to steal that one. Our kiddos want so badly to see snow-it reminds me of a photo I took the one day probably 5 years ago that we got flurries and I took the kids outside in it-all of them looked like that trying to taste a snowflake! 🙂NotJustChild'sPlay
Great art for a talented group of children. Thanks so much for sharing!Cindy
Wow. Fantastic ideas. Love the Christmas baubles, nearly makes me want to teach an older grade….nah! Thanks for the tour.Julie 🙂 Mrs Stowe's Kinder Cottage
I love them all – thanks so much for sharing. My favorite is the birch trees with the cardinals!
What a great variety! I was trying to figure out which might be your class. I never could decide… Hope you have happy holidays!KellyI'm Not Your Grandpa, I'm Your Teacher
These are very inspiring! I know that I will be doing a couple of the winter ones in January/February at school.Thank you for sharing.
Love it! I teach in a building that is over 100 years old with no sprinkler system so nothing can be hung in the halls or even in the classroom really because of the fire code. 🙁
WOW, so many ideas to pin and remember for next year!! Thanks for sharing. Merry Christmas!
These are great! I've seen a few of them on Pinterest, like the kids with their mouths open. So cute!❀ TammyForever in First
You do indeed have some talented teachers and students! The artwork is just beautiful!! I enjoyed all of it, but the heads back/ mouths open made me laugh. :)LoriConversations in Literacy
These would be great to share with Primary Success….she has a collection of art for different seasons….
These would be great to share with Primary Success….she has a collection of art for different seasons….
LOVE!! I'm feeling inspired to use some of these ideas for winter art! I hope your Christmas was Merry!Jenny